
Wednesday, December 17, 2008
Tuesday, December 2, 2008
Autodesk's Portable License Utility
Note: Although the Portable License utility allows you to transfer your product license between computers, your license agreement may not allow the installation of an Autodesk product on more than one computer. Read your license agreement to find out whether your product license permits the use of the Portable License utility.
What do you need?
You need to install the Autodesk product on both your Desktop and Laptop. Then you need to Activate your product.
Now you need both machines as you will be adding Computers with its unique identification code to the Portable License Utility.
To make it easier to explain i'll create the scenario that you have a laptop with the licensed software and you would like to use your desktop at home by tranferring the license from the laptop to the desktop and vice versa.
Start Portable License Utility on Laptop: Start>All Programs>Autodesk>Autodesk Product (Revit Architecture Suite 2009)> Portable License Utility.
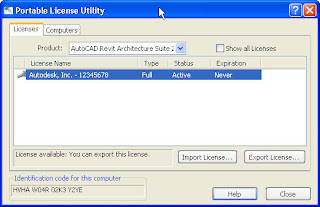 You need to add the computer with no license to the list of computers on the licensed computer by clicking on the Computers tab and click Add on the dialog box...
The following Add dialog box will appear
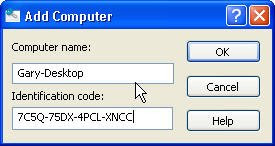
For the Computer Name you can you can enter your Computer Description for example:
For the Identification code, you will have to start up portable license utility on the Desktop and on bottom left hand corner of the dialog you will see the code.

If your identification code is correct click OK and you will notice its added to the computer list, if you recieve an error, review your identification code.
Now we wil transfer the license from the Laptop to the desktop...
Start Up the Portable License Utility if not opened. Ensure you are on the License tab and select the license you want to export.
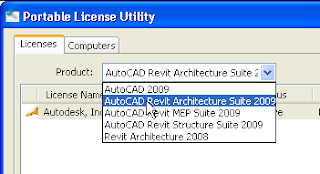
Note: If you have more than one Autodesk product installed on your machine slect from the drop down which license you would like to transfer.
Select the license file in the dialog and click the Export button.
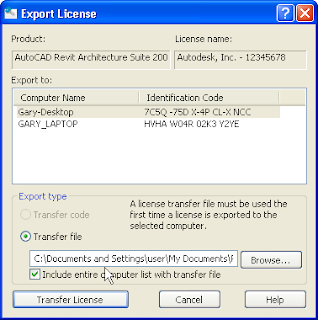 The Export Dialog will apear and you need to specify which machine you want to export the license to by clicking on the computer name, in this case it would be Gary-Desktop.
Ensure that the Transfer file option is selected and the Include entire computer list with transfer file is checked.
The default file path would be C:\Documents and Settings\user\My Documents\PLU250.
The PLU250 folder will be created automatically if not already there.
If yu checked and sure you ready to export you will click the button.
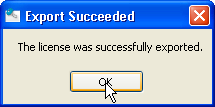
If the export was successful you will get the following message...
 NOT DONE YET....LOL
Now we need to import the license to the Desktop, first you need put the exported license file on a flash drive or somekind of storage media.
Note: Once you at the Desktop you start up the Portable License Utility and you only have this Utility if the Autodesk Product has been installed on the machine.
When the dialog appears you will have to import the tranfer file by clicking

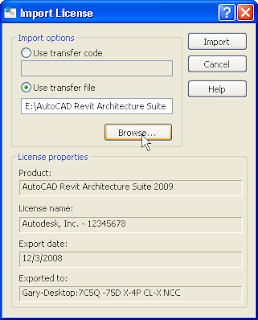 On the import license dialog ensure that the Use transfer file option is selected, then browse to you storage media where you saved the exported license file. In the license properties you will see which product, license name, export date and to which computer it has been exported to.
After the file path has been set you can now click Import on the dialog box.
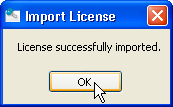
With a succesful import the following message will appear...
 And that wraps up the Portable License Utility....
.
Monday, November 10, 2008
Show site thickness in 3D View
Hey all got this one a few times... How do I show the 3D site's thickness in a 3D View? We all know that revit creates a 3D surface, but when viewing it in 3D, it only shows a surface edge and not a site thickness.
It is fairly simple though, we working once again with elements in Revit so every element has got some kind of element properties to it, so if its objects you can obviously use the hide and isolate tools.
 1. To create the thickness you either create a copy of the 3D view or work in the default 3D view.
2. You then switch on the section box in view properties dialog.
3. You then use the section box grips to cut


4. Next you select the Section Box, right click and select Hide in view.

And there you go Bobs your uncle…. Next you can now place your 3D site on a sheet with the section box hidden to give you a cool presentation of your topography.
Monday, September 1, 2008
Adding a new FILL PATTERN file to your Fill Patterns in Revit.
In this exercise we will be copying and pasting a existing custom *.pat file in the correct file directory and then importing that file or use in Revit Structure/ Architecture.
Save the file “revit-custom.pat” in the following directory:
C:\Program Files\Revit Architecture 2008\Program, or
C:\Program Files\Revit Structure 2008\Program, or
C:\Program Files\Revit MEP 2008\Program
After you have done that now we need to import the pattern into Revit Structure…
1. Start Revit Structure/ Architecture (if it’s not opened already) and click the Settings Drop Down on the Menu Bar and select Fill Patterns
2. After selecting the Fill Patterns… a fill patterns dialog appears and click Edit.
3. After clicking edit another dialog appears, the Modify Pattern Properties dialog appears.
· Select the custom option and the dialog changes, you need to give your hatch pattern a name by entering it in the Name text box and click the Import command button…
4. After clicking the import button a Import dialog appears and you need to navigate to the revit-custom.pat file so you can select the pattern you would like to import. Select the file and click open…
5. In the Modify Pattern Properties dialog, ensure that “COLUMN DASHED” is selected and click OK.
6. When clicking OK the imported fill pattern becomes part of the list and ready for use either in materials, object styles or as overrides in object styles.
That’s the end of this module…Have fun!


